- Download the Android SDK
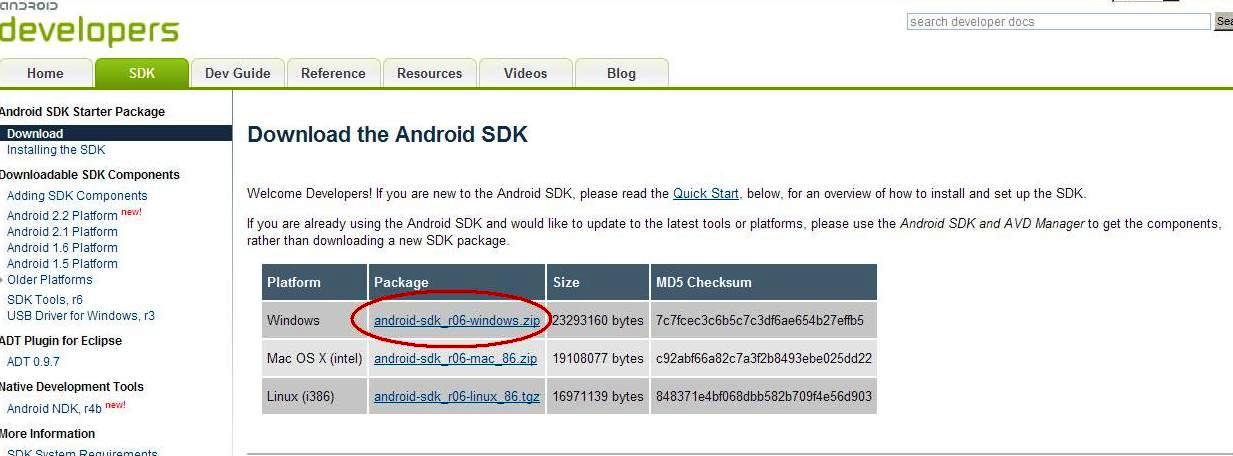
Goto http://developer.android.com/sdk/index.html
Choose android_sdk_windows, download and save the file at the desired location. And unzip.
- Preparing Your Development Computer
Before getting started with the Android SDK, take a moment to confirm that your development computer
meets the System Requirements. In particular, you may need to install the JDK before continuing,
if it's not already installed on your computer.
If you will be developing in Eclipse with the Android Development Tools (ADT) Plugin - the recommended
path if you are new to Android - make sure that you have a suitable version of Eclipse installed on
your computer (3.4 or newer is recommended). If you need to install Eclipse, you can download it
from this location:
http://www.eclipse.org/downloads/
A Java or RCP version of Eclipse is recommended. For Eclipse 3.5, the "Eclipse Classic" version is recommended.
- Install the Android SDK
The Android SDK archive now only contains the tools. It no longer comes
populated with a specific Android platform or Google add-on. Instead you
use the SDK Manager to install or update SDK components such as platforms,
tools, add-ons, and documentation.
In order to start developing applications, you must install at least one
version of the Android platform using the SDK Manager.
This requires an Internet connection, so if you plan to use the SDK
offline, please make sure to download the necessary components while online.
To start the SDK Manager, please execute the program "SDK Setup.exe".
Optionally, you may want to add the location of the SDK's primary tools directory to your system PATH.
The primary tools/ directory is located at the root of the SDK folder. Adding tools to your path lets
you run Android Debug Bridge (adb) and the other command line tools without needing to supply the full
path to the tools directory.
On Windows, right-click on My Computer, and select Properties. Under the Advanced tab, hit the Environment
Variables button, and in the dialog that comes up, double-click on Path (under System Variables).
Add the full path to the tools/ directory to the path.
If you will be using the Eclipse IDE as your development environment, the next section describes how
to install the Android Development Tools (ADT) plugin and set up Eclipse. If you choose not to use
Eclipse, you can develop Android applications in an IDE of your choice and then compile, debug and
deploy using the tools included in the SDK
- Adding Android Platforms and Other Components
The last step in setting up your SDK is using a tool included the SDK starter
package — the Android SDK and AVD Manager — to download
essential components into your development environment. Read the information
below to understand what components you'll need, then see Adding SDK Components for step-by-step
instructions on how to launch the Android SDK and AVD Manager and download the
components into your environment.
The SDK uses a modular structure that separates the major parts of the SDK
— Android platform versions, add-ons, tools, samples, and the API
documentation — into a set of separately installable components. The SDK
starter package, which you've already downloaded, includes only a single
component: the latest version of the SDK Tools. To develop any Android
application, you also need to download at least one Android platform into your
environment, although downloading additional components is highly recommended.
The SDK repository offers these types of components:
-
SDK Tools (pre-installed in the Android SDK starter
package) — Contains the full set of SDK tools for developing, debugging,
and testing your application code and UI. You can read about the tools in the Dev Guide and access them
in the
<sdk>/tools/ directory.
-
Android platforms — An SDK platform is
available for every production Android platform deployable to Android-powered
devices. Each platform component includes a fully compliant Android library and
system image, sample code, emulator skins, and any version specific tools. For
detailed information about each platform, see the overview documents available
under the section "Downloadable SDK Components," at left.
-
SDK Add-Ons — SDK add-ons provide a development
environment for specific Android external
library or a customized (but fully compliant) Android system image. The Android
SDK repository offers the Google APIs Add-On, which gives your application
access to powerful mapping capabilities through the
com.google.android.maps library. You can also add additional
repositories, so that you can download other SDK add-ons, where available.
-
USB Driver for Windows — Contains driver files
that you can install on your Windows computer, so that you can run and debug
your applications on an actual device. You do not need the USB driver unless
you plan to debug your application on an actual Android-powered device. If you
develop on Mac OS X or Linux, you do not need a special driver to debug
your application on an Android-powered device.
-
Samples — Contains the sample code and apps available
for each Android development platform. If you are just getting started with
Android development, make sure to download the samples to your SDK.
-
Documentation — Contains a local copy of the latest
multiversion documentation for the Android framework API.
To download components, use the graphical UI of the Android SDK and AVD
Manager, shown in Figure 1, to browse the SDK repository, select new or updated
components for download, and then install the selected components in your SDK
environment.

The Android Development Tools (ADT) plugin adds powerful extensions to the Eclipse integrated development environment. It allows you to create and debug your Android applications easier and faster. If you use Eclipse, the ADT plugin gives you an incredible boost in developing Android applications: